Why draw a circle when you can bounce one? Here’s a fun, colorful way to keep the kids busy while learning colors, shapes and more!
Looking for a process art painting activity for toddlers, preschoolers and school age kids that is a little different from the usual paintbrush and paper?
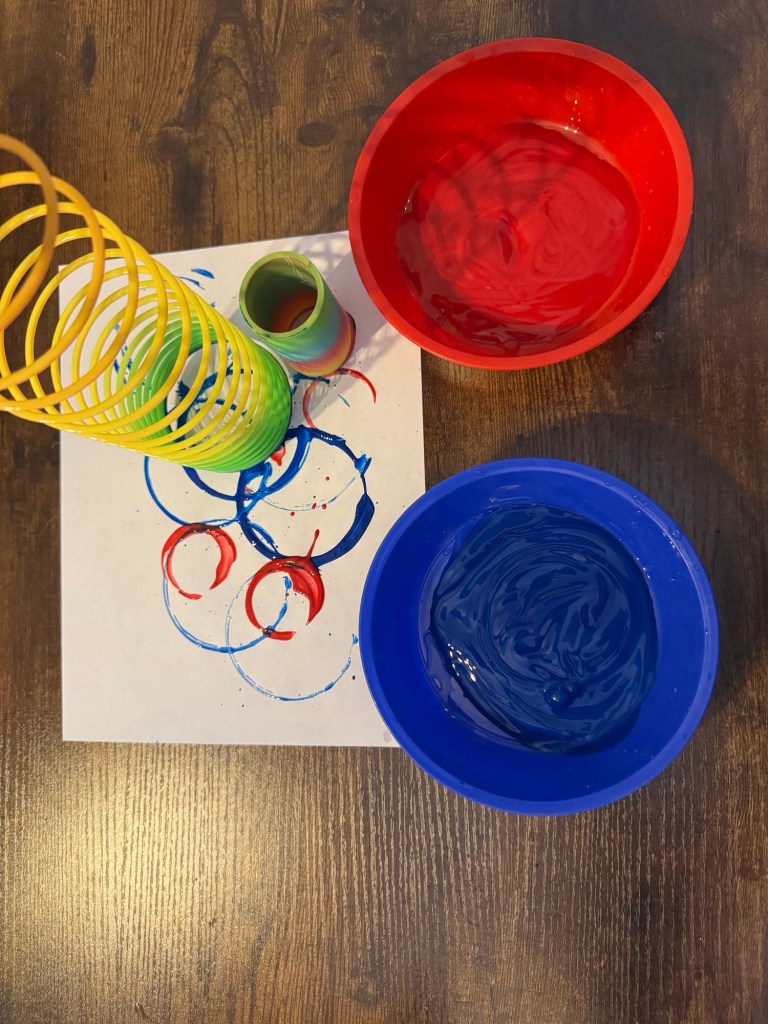
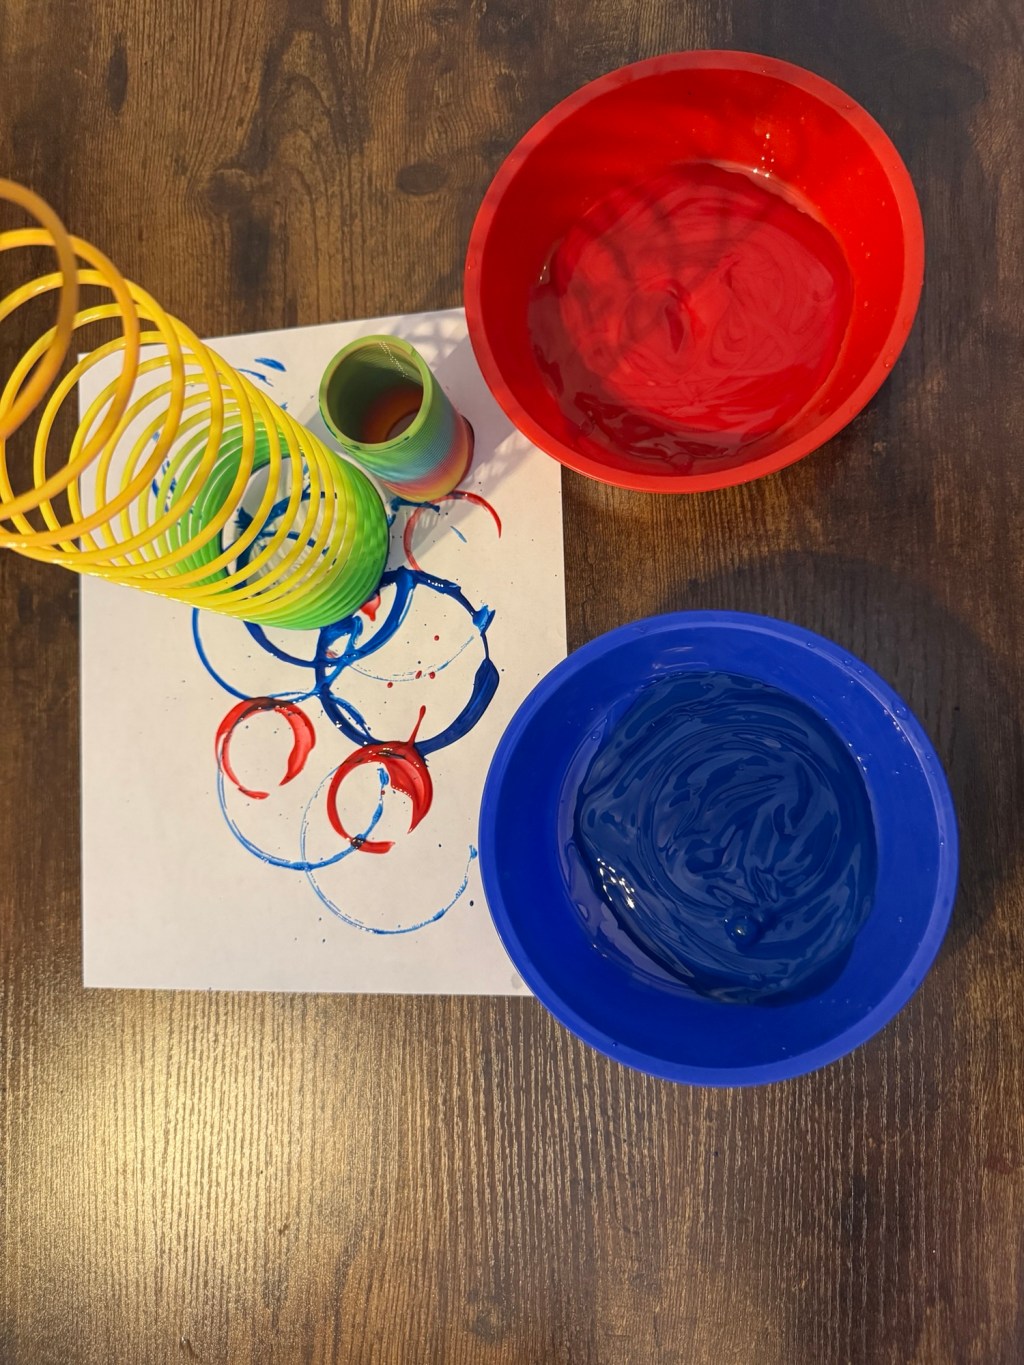
This Slinky painting activity turns a familiar toy into an unexpected art tool. Children can bounce, stretch, stamp and roll a Slinky through paint to create circles, lines and repeating patterns.
It is an easy process-art activity that encourages creativity, movement and hands-on learning. There is no picture to copy and no “right” way for the finished artwork to look. The exploration is the activity.
This post contains Amazon affiliate links. As an Amazon Associate, I earn from qualifying purchases at no additional cost to you.
Supplies for Slinky Painting
- Colorations washable paint – this is my favorite washable paint
- Paint bowls
- Plastic Slinky (we had large & small slinkys and found the large worked best)
- Large sheets of paper
- Roll of craft paper
- Art Smocks or old shirts
How to Set Up This Preschool Art Activity
Pour a small amount of washable paint into each bowl. You only need enough paint to lightly coat the bottom of the Slinky.
Place a large sheet of paper on a protected surface. For more room to explore, tape several pieces of paper together or use a long roll of paper.
Set the Slinky and paint bowls beside the paper, then invite the children to explore.
How to Paint With a Slinky
- Dip one end of the Slinky lightly into the paint.
- Press or bounce it onto the paper to create circular prints.
- Stretch the Slinky slightly and press it down to create longer patterns.
- Try rocking, rolling or gently walking it across the paper.
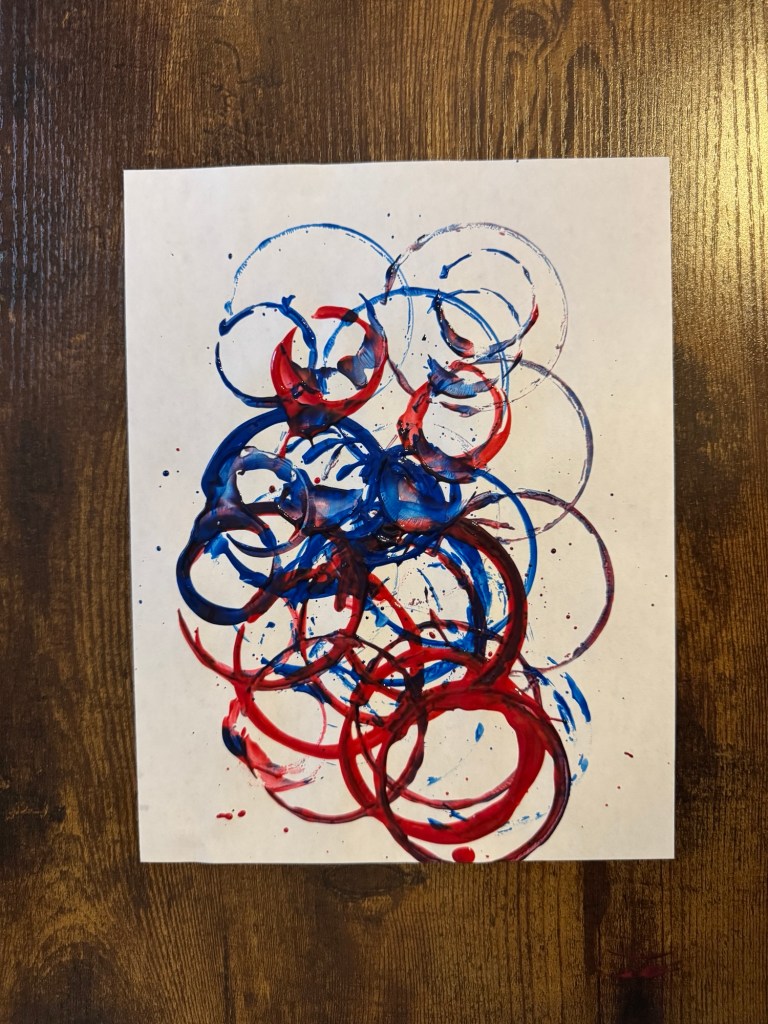
- Add another color and notice what happens when the colors overlap.
Children may stamp with one end, press the entire Slinky onto the paper or discover a completely different way to use it. That experimentation is an important part of open-ended process art.
A little paint goes a long way. Too much paint can fill the spaces between the coils and make the Slinky patterns harder to see.
Questions to Extend the Learning
A few thoughtful questions can encourage children to observe, predict and describe what they notice:
- What kind of mark did the Slinky make?
- What changes when you stretch it?
- How could you make the circles farther apart?
- What happens when two paint colors overlap?
- Can you make the Slinky travel across the paper?
- Which movement created your favorite pattern?
- What do you think will happen if you press harder or softer?
What Children Learn Through Slinky Process Art
This creative painting activity supports several areas of early childhood development.
Fine-Motor Skills
Grasping, dipping, pressing and stretching the Slinky strengthens the hands and fingers children use for drawing, writing, cutting and completing everyday tasks.
Hand-Eye Coordination
Children coordinate their hand movements with what they see as they aim, stamp and move the Slinky across the paper.
Cause and Effect
Each movement creates a different result. Children begin connecting their actions to the marks they see: “When I stretch it, the circles spread out.”
Early Math and Science Skills
The repeating coils encourage children to notice circles, lines, spacing, size and patterns. Overlapping paint colors also provides opportunities to make predictions and explore color mixing.
Creative Thinking
Turning a familiar toy into a painting tool encourages flexible thinking. Children discover that everyday materials can be explored in more than one way.
Gross-Motor Development
Painting on a large sheet of paper encourages children to reach, stretch and move their arms across the workspace. Try the activity while standing at a table or working outside on the ground to encourage even bigger movements.
Ways to Extend the Slinky Painting Activity
Offer two paint colors and observe what happens when they overlap. Use one long sheet of paper for a collaborative preschool art project, or provide individual sheets for children to create their own designs.
You can also compare prints made with the Slinky compressed, slightly stretched and fully extended.
For an early math connection, invite children to:
- Find repeating patterns
- Compare large and small circles
- Notice whether the coils are close together or far apart
- Count a small group of circular prints
- Describe the shapes and lines they created
The goal is not to make matching artwork. It is to give children space to test an idea, observe the result and decide what to try next.
That is where the real learning takes root.
Helpful Slinky Painting Tips
- Choose a plastic Slinky that can be washed.
- Use washable paint and protect nearby surfaces.
- Begin with a small amount of paint.
- Provide a separate bowl for each paint color.
- Supervise children so the Slinky is used as an art tool and is not wrapped around the body.
- Wash the Slinky before the paint dries between the coils.
This easy Slinky painting activity is a playful addition to preschool, pre-K or kindergarten and up art centers. It combines process art, fine-motor practice, early math and creative movement—all with one delightfully unexpected painting tool.
Sometimes the most meaningful art experiences begin with one simple question:
What else could we do with this?


Leave a Reply